MSX GMII Exporter
The GMII exporter can convert (background) images to MSX graphics mode II / SCREEN 2 compatible formats. The plug-in can export the data into the (binary) format used by MSX’s video display processor - i.e. a representation of the relevant VRAM sections.
Using the plug-in
The GMII Exporter can be found in the GIMP main menu under:
Filters –> Misc –> MSX GMII Exporter
To use the exporter just load an image and launch the plug-in.
When launching the plug-in an dialog with the exporter options menu will pop-up:
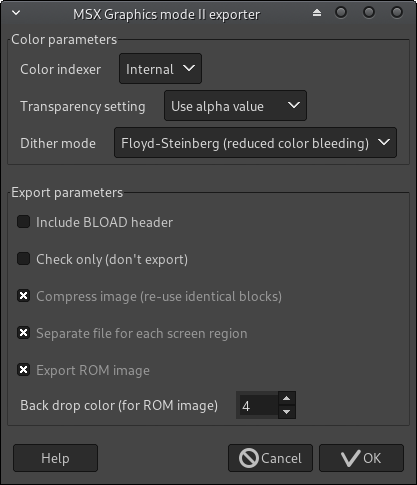
The options are explained below.
To run the export just click “OK”. The output files will be stored in the same folder as the image file.
The exporter will automatically index the image [1] to the MSX’s color palette and convert pixels, which are not valid in Graphics mode II (i.e. in each row of an 8x8 pixel block only two different colors may be used).
A new layer with the converted image will be added.
Below example illustrates the process on a picture of the GIMP mascot “Wilber” (by Jakub Steiner, CC BY-SA 3.0):
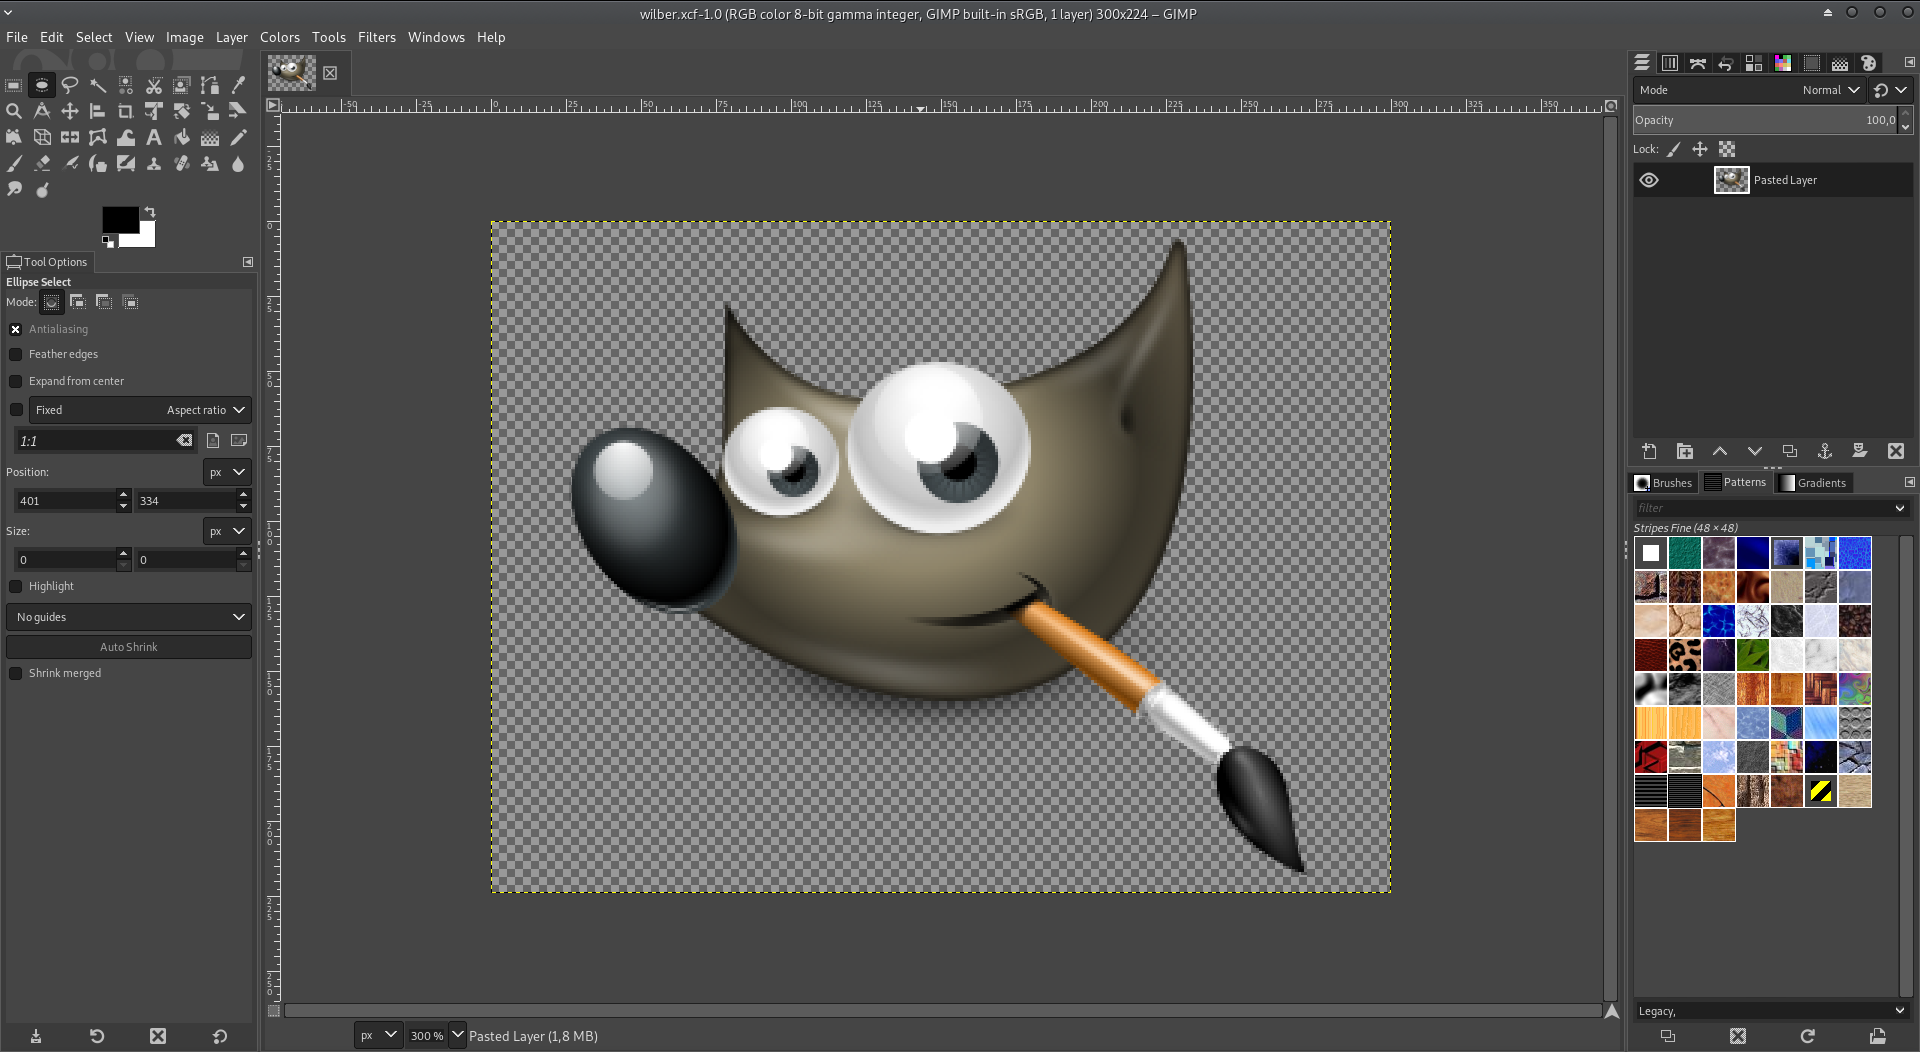
Original image (RGB)
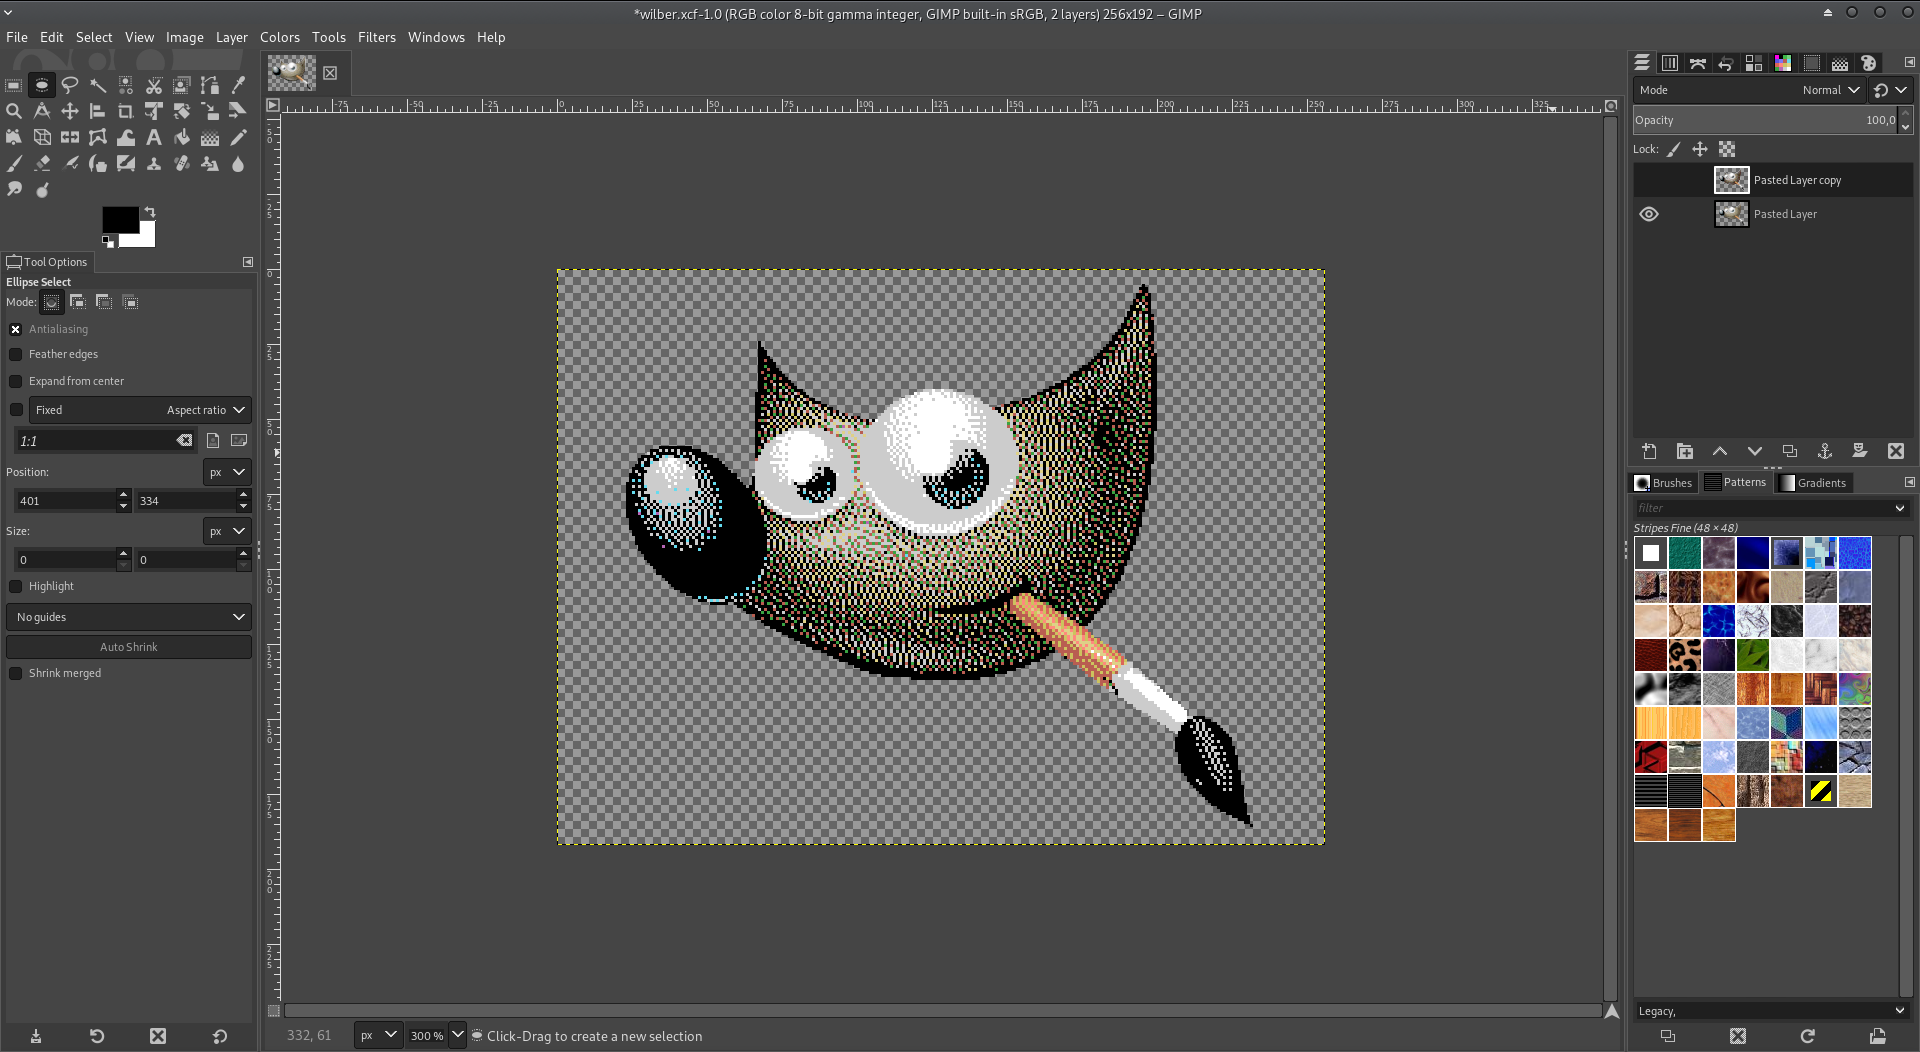
Image converted to the MSX’s color palette (Indexed)

Image corrected for MSX Graphics mode 2 limitations
Export options
- Color indexer
- You may select either the GIMP’s “Internal” indexer (which uses the built-in gimp-image-convert-indexed procedure by Spencer Kimball & Peter Mattis) or the MSXize plug-in by Weber Estevan Roder Kai. Note, that you need to install MSXize separately - checkout the MSXize project gitlab page.
- Transparency setting
Provides different options how transparent pixels (MSX color 0) shall be identified. Possible values are:
- Use alpha value
- Treats all pixels with an alpha value of 0 as transparent
- Use color #ff00eb
- All pixels of RGB color #ff00eb will be treated as transparent
- No transparency
- Image will only be indexed to the 15 real colors of the MSX palette
Note, that pixels of alpha value = 0, will also be considered as transparent, if the other two options are selected.
- Dither mode
- If you are using the internal indexer you can provide the dither type parameter using this checkbox.
- Include BLOAD header
If selected, a 7 byte header is prepended to the exported binary files. MSX basic’s BLOAD can then be used to load the file contents into RAM/VRAM.
Below is an example MSX-basic script to setup the VDP and load the name, pattern and color table to the corresponding VRAM locations.
10 'reg 0 - screen 2
20 VDP(0) = &H02
30 '.reg 1 - 16k, 16x16 sprites, mag. on
40 VDP(1) = &HE3
50 '.reg 2 - name table at &h3800
60 VDP(2) = &HE
70 '.reg 3 - color table at &h2000
80 VDP(3) = &HFF
90 '.reg 4 - pattern table at &h0000
100 VDP(4) = &H03
110 '.reg 5 - sprite attributes table at &h3B00
120 VDP(5) = &H76
130 '.reg 6 - sprite pattern table at &h1800
140 VDP(6) = &H03
150 '.reg 7 - backdrop color = green
160 VDP(7) = &H02
170 '.....end of VPD setup...
180 BLOAD"wilber.nt",S,&h3800
190 BLOAD"wilber.pt",S,&h0000
200 BLOAD"wilber.ct",S,&h2000
210 'end of code
- Check only (don’t export)
- If selected the image will be checked for violations of graphics mode II (e.g. more than two colors in a row of 8x8 pixel block). A new layer will be added to the image with the invalid rows highlighted in red.
- Compress image (re-use identical blocks)
If selected identical blocks will only be saved once in the pattern and color tables thus reducing the table sizes. The name tables will be generated accordingly.
If not selected each block is mapped to the corresponding position in the name tables (i.e. name tables simply contain all numbers counting from 0 to 255).
- Seperate file for each screen region
If selected, the exporter will write the tables for each of the 3 screen regions (top, mid, bottom) into seperate files. I.e. using this option the exporter will generate 9 binary files, which have the name of the image file appended by: .pt1, .pt2, .pt3, .ct1, .ct2, .ct3, .nt1, .nt2 and .nt3 (where “pt” files hold the pattern generator table, “ct” the color table and “nt” the name table).
If this option is not selected a single file will be exported for the pattern generator table (.pt), the color table (.ct) and the name table.
- Export ROM image
- If selected a 16k ROM image will be exported. The file will have the same name as the image file appended by “.rom”. The ROM contains a simple program, which displays the image. Useful for testing the image output on real hardware or an emulator - like in the screen shot below.
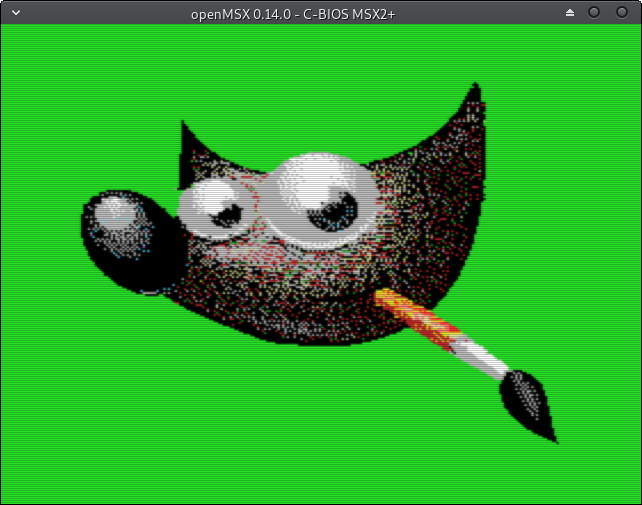
Screen shot of openMSX running the test ROM image for the example above
| [1] | You can also manually do the indexing. If the plug-in is launched on an already indexed image it will not re-index it. But note, that the index number should match the MSX1 color numbers. |